Ruby on Rails – Deployment Tutorial
This tutorial shows how to deploy your Ruby on Rails application on an Ubuntu Linux 22.04 LTS Linux VM.
The deployment process will be fully automated so that it requires only one shell command to deploy a new version:
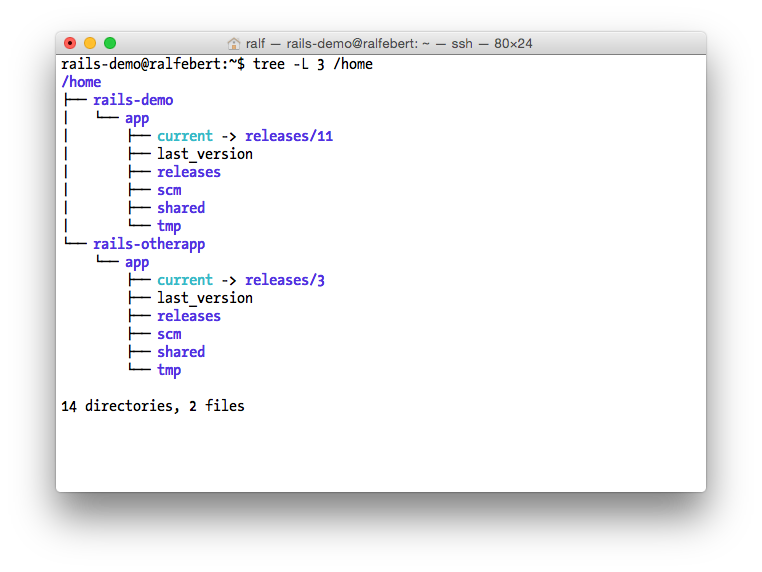
The tutorial establishes naming conventions and a folder structure suitable for deploying multiple Rails applications on the same server:
Using different Ruby or Rails versions is supported, so you can upgrade a single application to the latest Rails or use the latest Rails for a new application without having to upgrade all the other apps at the same time.
Setting everything up takes about 2 hours. Once you are familiar with the process it takes about 15 minutes to add another application to the server, and mere seconds to deploy a new version.
The tutorial makes the assumption that the applications run on only one server, that the server is used only for hosting Rails applications and that only trusted users have shell access to the server.
Nothing fancy like Docker containers or tools like Capistrano are used here. It's a very well matured procedure for hosting a Ruby on Rails apps on a VM by installing the required software and configuring it.
Tools
-
I recommend to use a DigitalOcean VM for Ruby on Rails hosting: Their most affordable server VM is $6/month which is sufficient for a Ruby on Rails application and great for trying things out. You can get your Ruby on Rails server running in under a minute. If you sign-up using this link, you'll get $200 in credit so you can try out setting up a VM for free.
-
Ubuntu 22.04 LTS is the most common Linux distribution for servers and it will be supported with security updates for years to come.
-
Ruby and Rails: This tutorial uses the latest stable versions at time of writing - Ruby 3.2.2 and Rails 7.0.8. It was also tested and is known to work with Rails 6.
-
Ruby Version Manager (rvm) is used to manage multiple Ruby versions on the same server. rbenv might also do the trick nowadays, but when I wrote the original version of the tutorial, rvm was just easier to setup and it hasn't let me down since then.
-
Deployment from a Git repository so that the deployment process is independent from the local environment. I use Github to set up a private repository. The application is cloned using a SSH deployment key directly from the repository during the deployment process.
-
Mina is used to handle the Ruby on Rails deployment. It provides a directory structure for the app that allows to switch between different releases while sharing configuration files, logs etc. between releases. It generates a deployment script locally and runs it on the server - including updating the gems via Bundler, migrating the database and generating assets on the server side.
-
PostgreSQL: PostgreSQL is the most commonly used database for Rails apps. It can authenticate users based on Linux user accounts so you don't need extra passwords for the database.
-
unicorn + nginx: For every application there will be a unicorn process that runs under a separate user account with a single nginx HTTP server forwarding requests. This setup doesn't require any web server modules and supports running different Ruby versions at the same time.
Requirements
For this tutorial you need to have good knowledge of Linux server administration using a command line shell. You need to know how to version a project using Git.
USE THIS ARTICLE AT YOUR OWN RISK: None of the authors, in any way whatsoever, can be responsible for your use of the information contained in these web pages. Do not rely upon any information found here without independent verification.
Setting up an example app
Fixing server issues and app-specific issues at the same time can be very error-prone. When you work through this tutorial the first time, I recommend to get a simple demo application running, then deploy your own Rails app. You can use the following steps to create a simple example app:
-
Check your Ruby and Rails versions:
$ ruby --version
ruby 3.2.2
$ gem list rails
rails (7.0.8)
If you don't have the latest versions, install rvm according to the instructions on their website and then install the latest Ruby on Rails:
rvm install ruby-3.2.2
rvm use 3.2.2
gem update --system && gem install bundler rails
-
Create a new app:
rails new demo
-
Set the ruby version that you want to use in .ruby-version:
cd demo/
echo "3.2.2" > .ruby-version
-
Edit the Gemfile and add a production group with the gems pg (PostgreSQL) and unicorn (the Rack HTTP server). Wrap the sqlite3 gem in a group for development and test so that it doesn't get installed in production. Add the mina gem for the development environment:
group :production do
  gem 'pg'
  gem 'unicorn'
end

group :development, :test do
  gem 'sqlite3'
  gem 'mina', '1.2.4'
end
If you like, you can also use the unicorn server during development by declaring the dependency outside of the :production group.
-
Configure bundler to include the Linux platform and install all dependencies locally, skipping those from the production group:
bundle lock --add-platform x86_64-linux
bundle config set --local without 'production'
-
Generate a controller for serving a page and a model:
bin/rails generate controller welcome index
bin/rails generate model counter name:string value:integer
-
Edit config/routes.rb and set the welcome controller as root route (watch out, it is welcome#index, not welcome/index):
Rails.application.routes.draw do
  root 'welcome#index'

  # For details on the DSL available within this file, see http://guides.rubyonrails.org/routing.html
end
-
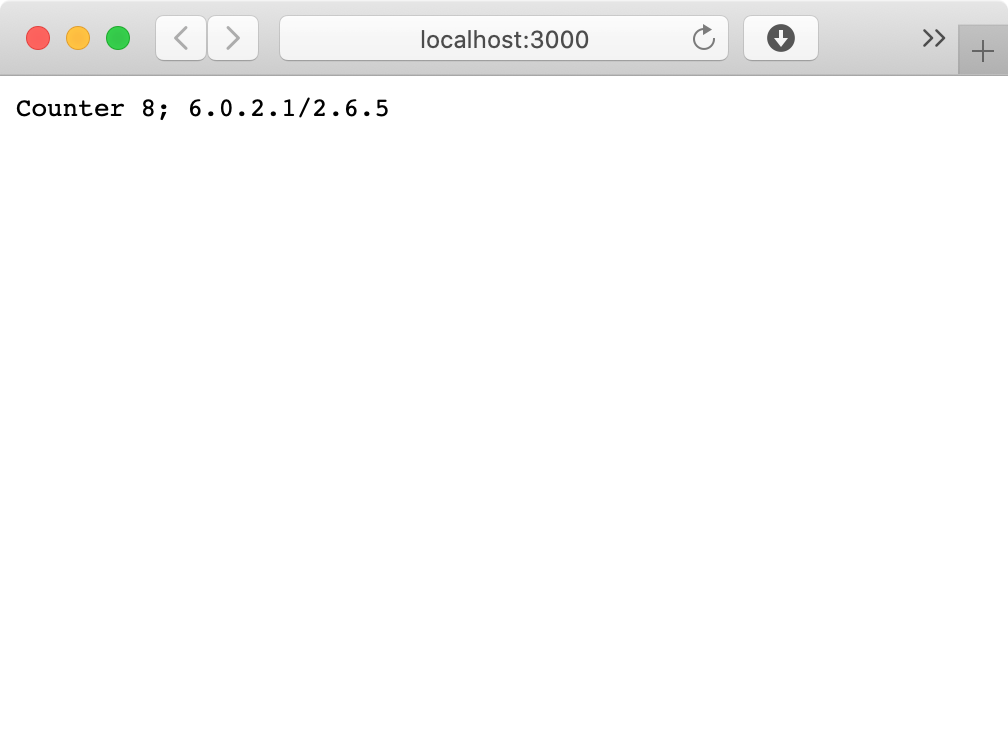
Edit app/controllers/welcome_controller.rb and make it use the model object:
class WelcomeController < ApplicationController
  def index
    counter = Counter.find_or_create_by(name: "default")
    counter.value = (counter.value || 0) + 1
    counter.save!
    render plain: "Counter #{counter.value}; #{Rails.version}/#{RUBY_VERSION}"
  end
end
-
Migrate the database and run the application locally:
bin/rake db:migrate
bin/rails s
-
Check that the app works:
-
Create a local git repository and commit the app:
git init git add . git commit -m "demo project" -
Create a Git repository on Github and push the project to the repository, for example:
git remote add origin git@github.com:example/rails-demo.git
git push -u origin master
VM setup
-
Sign-up at DigitalOcean (if you use this link, you'll get $200 in credit so you can set up a VM for free).
-
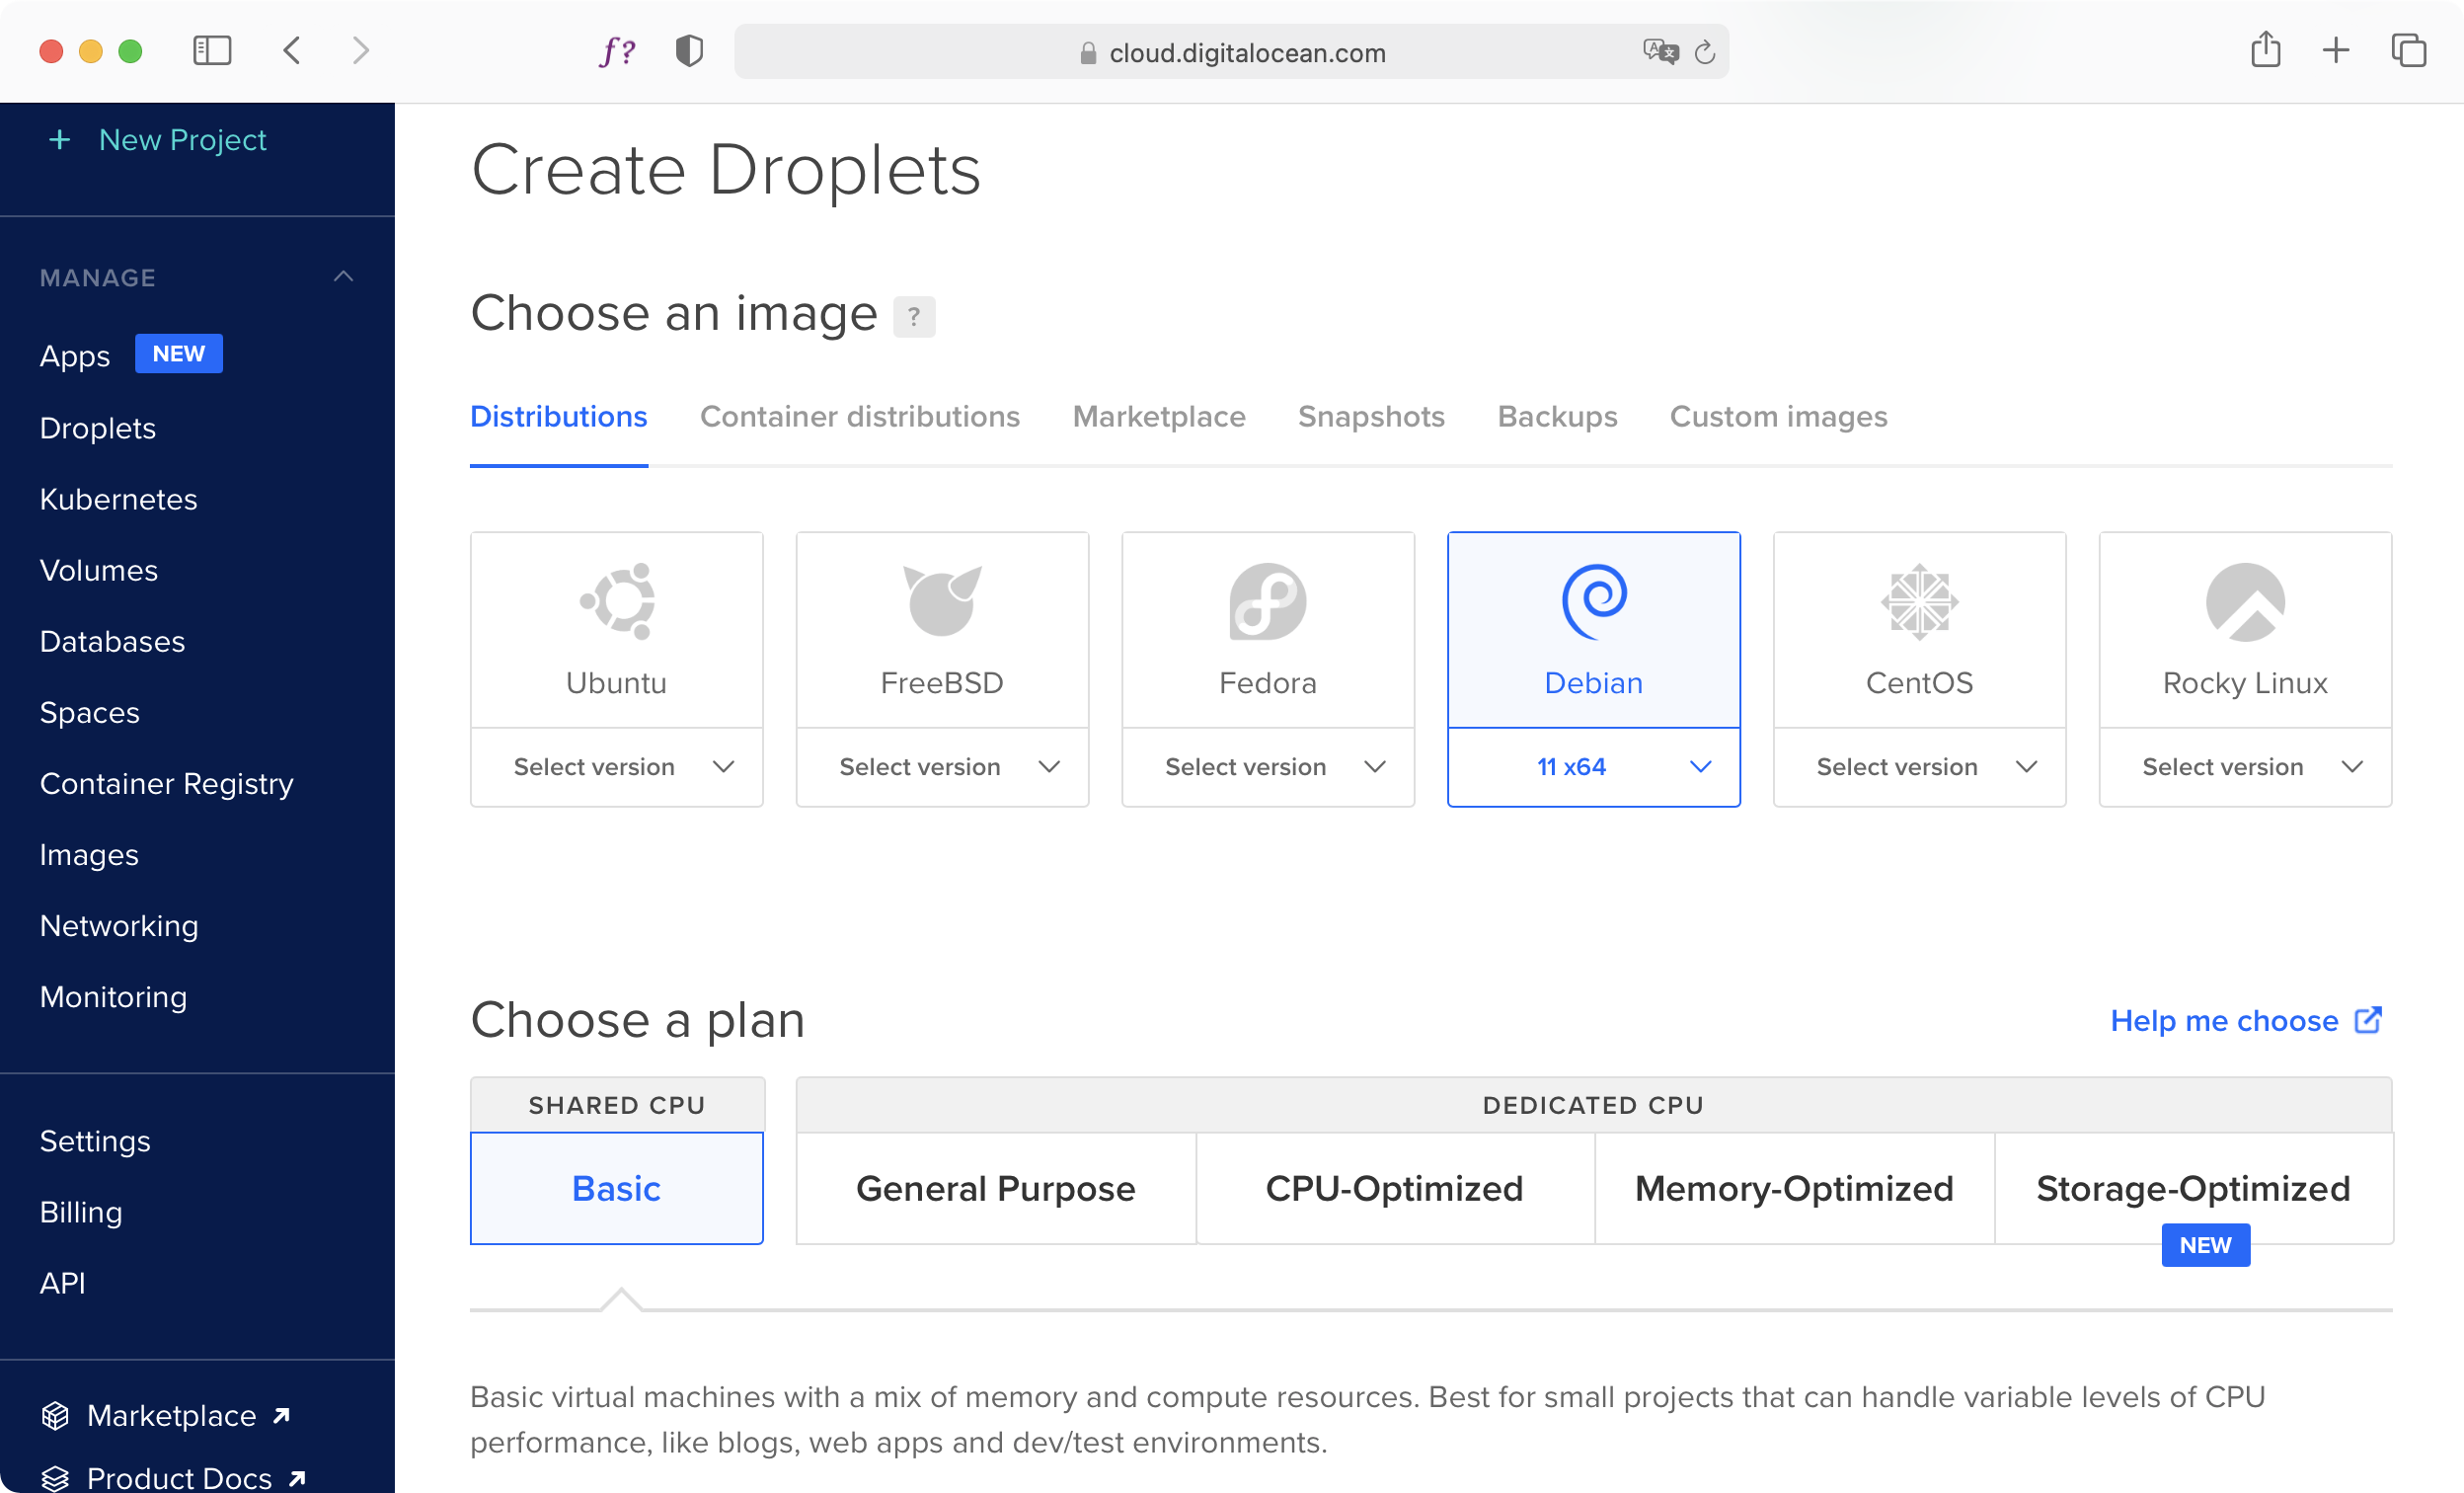
Create a new droplet and select Ubuntu 22.04 (LTS) x64 as Image. Also select the size for your droplet (warning: you can easily upgrade to larger sizes, but it is not possible to downgrade to a size with a smaller disk):
-
Add an SSH key for logging in to your server without a password:

If you don't have used SSH keys before, check out the guide How To Use SSH Keys with DigitalOcean Droplets.
-
Create the Droplet and wait for the VM to be created, then log-in to the system:
ssh root@serverip
-
Check the open ports (should be only SSH):
netstat --listening --tcp
-
Update all packages:
apt update && apt upgrade -
Enable the ufw firewall so that unconfigured services will not be exposed (the IP ranges of VM providers are frequently scanned for not fully configured servers):
apt install ufw && ufw allow 22 && ufw logging off && ufw enable && ufw status
The firewall rules are automatically saved and restored on reboot.
-
Install the following required packages:
apt install curl git nginx postgresql libpq-dev
-
Install Ruby Version Manager (RVM) according to the instructions on the rvm website.
-
Log-out and log-in to enable rvm.
-
Install Ruby and the bundler gem:
rvm install 3.2.2 && rvm --default use 3.2.2 && gem update --system && gem install bundler
Setting up the Ruby on Rails app
-
Create a user and a database for the application:
APP_NAME=rails-demo
sudo -u postgres createuser $APP_NAME
sudo -u postgres createdb $APP_NAME --owner=$APP_NAME
You can ignore the “could not change directory to "/root": Permission denied” warnings.
On local connections, PostgreSQL uses the peer authentication method that obtains the client's user name from the operating system and uses it as database user name. So if you're logged in as the app user rails-demo, you're allowed to access the rails-demo database using the psql client.
-
Create a user for the app:
adduser $APP_NAME --disabled-password --gecos ""
-
Add your SSH public key to the user home so you can log-in as the app user.
To copy the SSH keys from root to the user:
mkdir /home/$APP_NAME/.ssh
cp ~/.ssh/authorized_keys /home/$APP_NAME/.ssh/
chown $APP_NAME.$APP_NAME /home/$APP_NAME/.ssh -R
chmod go-rwx /home/$APP_NAME/.ssh -R
-
Log-out and log-in as the app user:
ssh rails-demo@serverip
-
Generate a SSH key pair without password as deployment key:
ssh-keygen && cat ~/.ssh/id_rsa.pub -
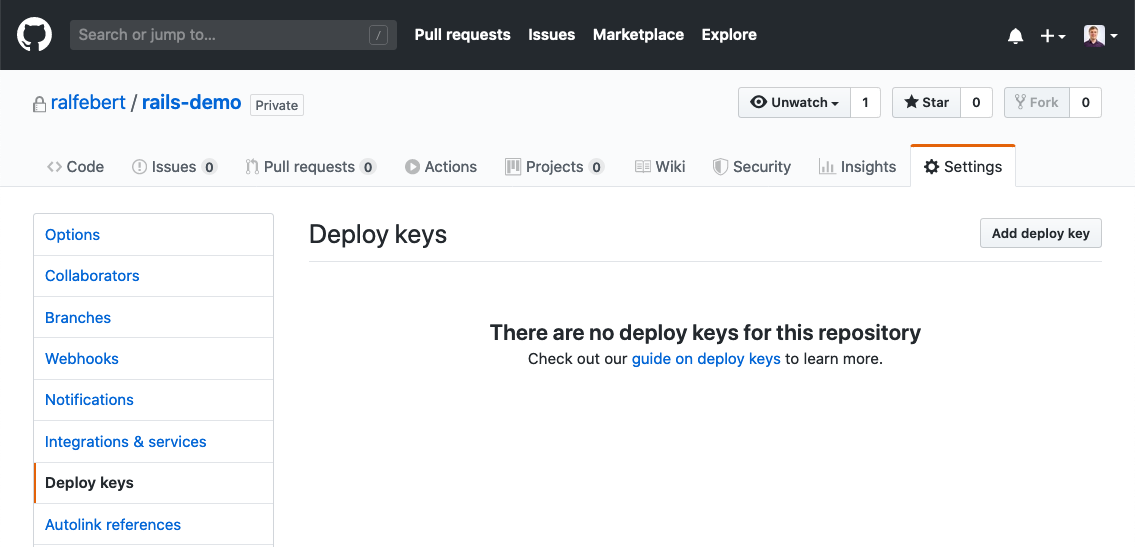
Add the public key (the line starting with ssh-rsa ...) as deploy key to the repository:
-
Locally, add a config/deploy.rb configuration file to the Rails project (example configuration):
cd demo/
curl https://raw.githubusercontent.com/ralfebert/rails-deploy/master/example-deploy.rb > config/deploy.rb
Change the option :domain to the server ip and :repository to the clone URL of the Project repository.
The example configuration for Mina has been customized for this tutorial to set up rvm according to .ruby-version and to automatically create a database.yml and secrets.yml configuration file on the server during mina setup (show diff).
-
Let mina create the app folder structure on the server:
mina setup
-
On the server, if needed, edit the created configuration files:
nano app/shared/config/database.yml
nano app/shared/config/secrets.yml
-
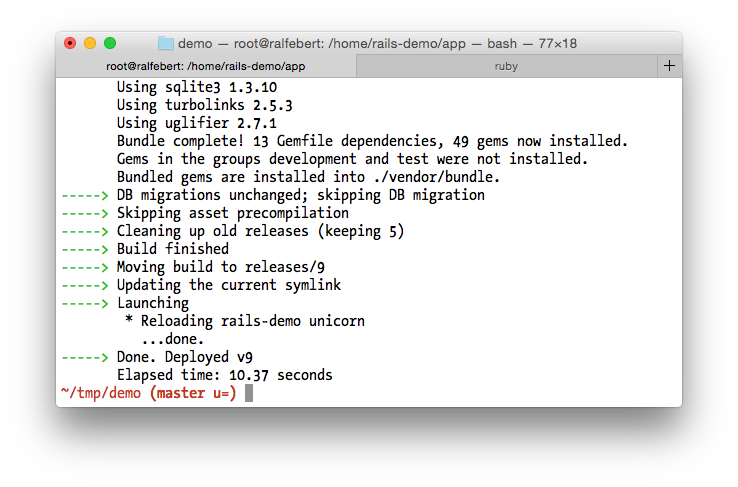
Deploy the app to the server:
mina deploy
This will get the project from the repository, install all gems, update the database, create the assets and finish like this:
... -----> Launching -----> Done. Deployed v1 Elapsed time: 168.77 seconds -
To test the app without exposing it to the public, log-in to the server forwarding a port:
ssh -L 4000:localhost:4000 rails-demo@serverip -
Create a unicorn configuration file on the server:
curl https://raw.githubusercontent.com/ralfebert/rails-deploy/master/example-unicorn > ~/app/shared/config/unicorn.conf.rb
The example configuration looks like this:
app_path = File.expand_path(File.join(File.dirname(__FILE__), '../../'))

listen '127.0.0.1:4000'
listen File.join(app_path, 'shared/unicorn.sock'), :backlog => 64

worker_processes 2

working_directory File.join(app_path, 'current')
pid File.join(app_path, 'shared/unicorn.pid')
stderr_path File.join(app_path, 'current/log/unicorn.log')
stdout_path File.join(app_path, 'current/log/unicorn.log')
Edit it if you wish to customize it:
nano ~/app/shared/config/unicorn.conf.rb
-
To test the app installation, run the unicorn Rails server directly:
cd ~/app/current
RAILS_ENV=production bundle exec unicorn -c ~/app/shared/config/unicorn.conf.rb
-
Open http://localhost:4000/ (via the SSH port forwarding) to check if the Rails application is running on the server as expected.
Otherwise, check the application log files:
tail ~/app/shared/log/*
Unicorn as systemd service
-
Log-out and log-in as root again:
ssh root@serverip
-
Create a systemd service for unicorn:
curl https://raw.githubusercontent.com/ralfebert/rails-deploy/master/example-systemd > /etc/systemd/system/rails-demo.service
Example configuration:
[Unit]
Description=rails-demo service
After=network.target

[Service]
Type=forking
WorkingDirectory=/home/rails-demo/app/
User=rails-demo
ExecStart=/usr/local/rvm/bin/rvm in /home/rails-demo/app/current/ do bundle exec unicorn -D -c /home/rails-demo/app/shared/config/unicorn.conf.rb -E production
SyslogIdentifier=unicorn-rails-demo
# stop by sending only the main process a SIGQUIT signal
KillMode=process
KillSignal=SIGQUIT
# Enable reloading unicorn via HUP signal
ExecReload=/bin/kill -HUP $MAINPID
# Try to restart the service after 1 second
Restart=always
RestartSec=1
# Path to Unicorn PID file (as specified in unicorn configuration file)
PIDFile=/home/rails-demo/app/shared/unicorn.pid

[Install]
WantedBy=multi-user.target
-
Customize the service configuration: Replace all occurences of rails-demo to the name of your actual app/user (the systemd configuration doesn't support variables so you have to manually replace the name in the service configuration):
nano /etc/systemd/system/rails-demo.service
-
Test starting and stopping the server:
systemctl daemon-reload
systemctl start rails-demo
systemctl status rails-demo
systemctl restart rails-demo
-
Check the Rails application log files and test the app using SSH port forwarding:
tail /home/rails-demo/app/shared/log/*
-
Enable the service on boot:
systemctl enable rails-demo
Web server setup
The unicorn server is not made to serve HTTP requests directly, so let's put a nginx web server in front of it:
-
Disable the default page:
rm /etc/nginx/sites-enabled/default
-
Create a nginx site for the application:
curl https://raw.githubusercontent.com/ralfebert/rails-deploy/master/example-nginx-site > /etc/nginx/sites-available/rails-demo
Example configuration:
upstream rails-demo {
	server unix:/home/rails-demo/app/shared/unicorn.sock fail_timeout=0;
}

server {
	listen 80;
	server_name example.com;

	root /home/rails-demo/app/current/public;

	location /assets/  {
		gzip_static on; # serve pre-gzipped version
		expires 1M;
		add_header Cache-Control public;
	}

	location / {
		try_files $uri @app;
	}

	location @app {
		proxy_set_header X-Forwarded-For $proxy_add_x_forwarded_for;
		proxy_set_header X-Forwarded-Proto $scheme;
		proxy_set_header Host $http_host;
		proxy_redirect off;
		proxy_pass http://rails-demo;
	}
}

server {
	listen 80;
	server_name www.example.com;
	return 301 http://example.com$request_uri;
}
Edit the configuration as needed:
nano /etc/nginx/sites-available/rails-demo
-
Enable the site configuration:
ln -s /etc/nginx/sites-available/rails-demo /etc/nginx/sites-enabled/rails-demo
-
Reload nginx if the nginx configuration is ok:
nginx -t && systemctl reload nginx -
Grant permissions to enter the home directory of the rails application, otherwise nginx cannot access the unicorn.sock file and will respond with an Permission denied (502 Bad Gateway) error:
chmod 755 /home/rails-demo
-
Enable port 80 in the firewall:
ufw allow 80 -
Check if the application responds as expected, check the log files otherwise:
tail /var/log/nginx/error.log /home/rails-demo/app/shared/log/*
-
Change the unicorn configuration to not listen on localhost:4000 anymore:
nano /home/rails-demo/app/shared/config/unicorn.conf.rb
systemctl restart rails-demo
Re-deploying the app
-
Allow the app user to restart the server app - as root on the server, run visudo:
EDITOR=nano visudo
add a line at the end to configure that the app user is allowed to restart the server:
rails-demo ALL=(ALL) NOPASSWD: /bin/systemctl restart rails-demo
-
Edit config/deploy.rb in the Rails application and enable the restart command:
on :launch do
  command "sudo systemctl restart #{fetch(:user)}"
end
-
Make a visible change in the app, commit the change and re-deploy:
nano app/controllers/welcome_controller.rb
git commit -a -m "counter changed"
git push && mina deploy