Using Custom cells to customize UITableViewCells
 UIKit, Xcode 13 & iOS 15
 Developers without prior iOS knowledge
This tutorial shows how to use the cell style Custom in a Storyboard to customize the views of a UITableView cell:
-
Download Countries-cells.zip as a starter project. This contains a UITableViewController with regular cells. Make yourself familiar with the code. If it is not straightforward to you, have a look at the UITableViewController tutorial.
-
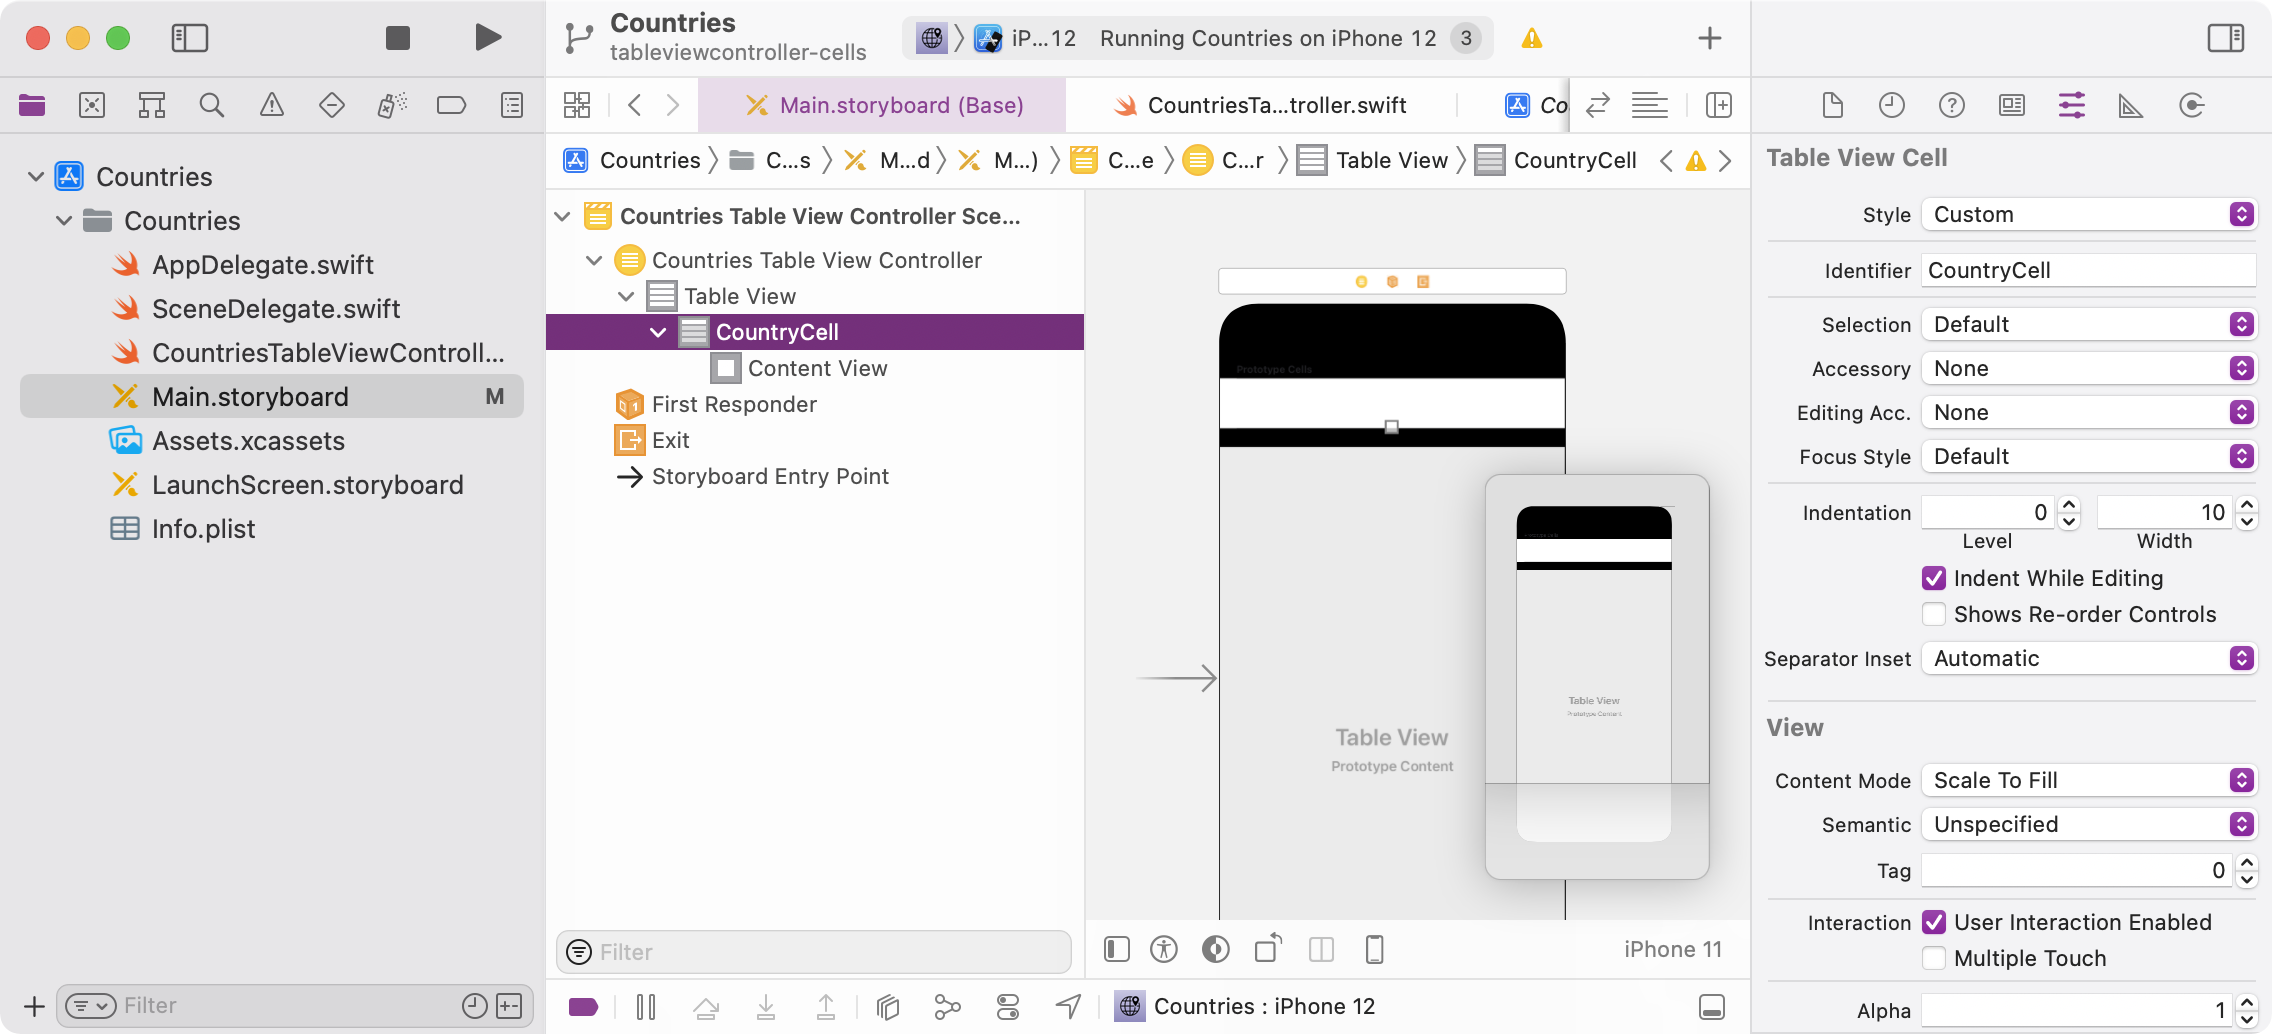
Open the storyboard and for the CountryCell of the TableViewController, configure Custom as Cell Style:
-
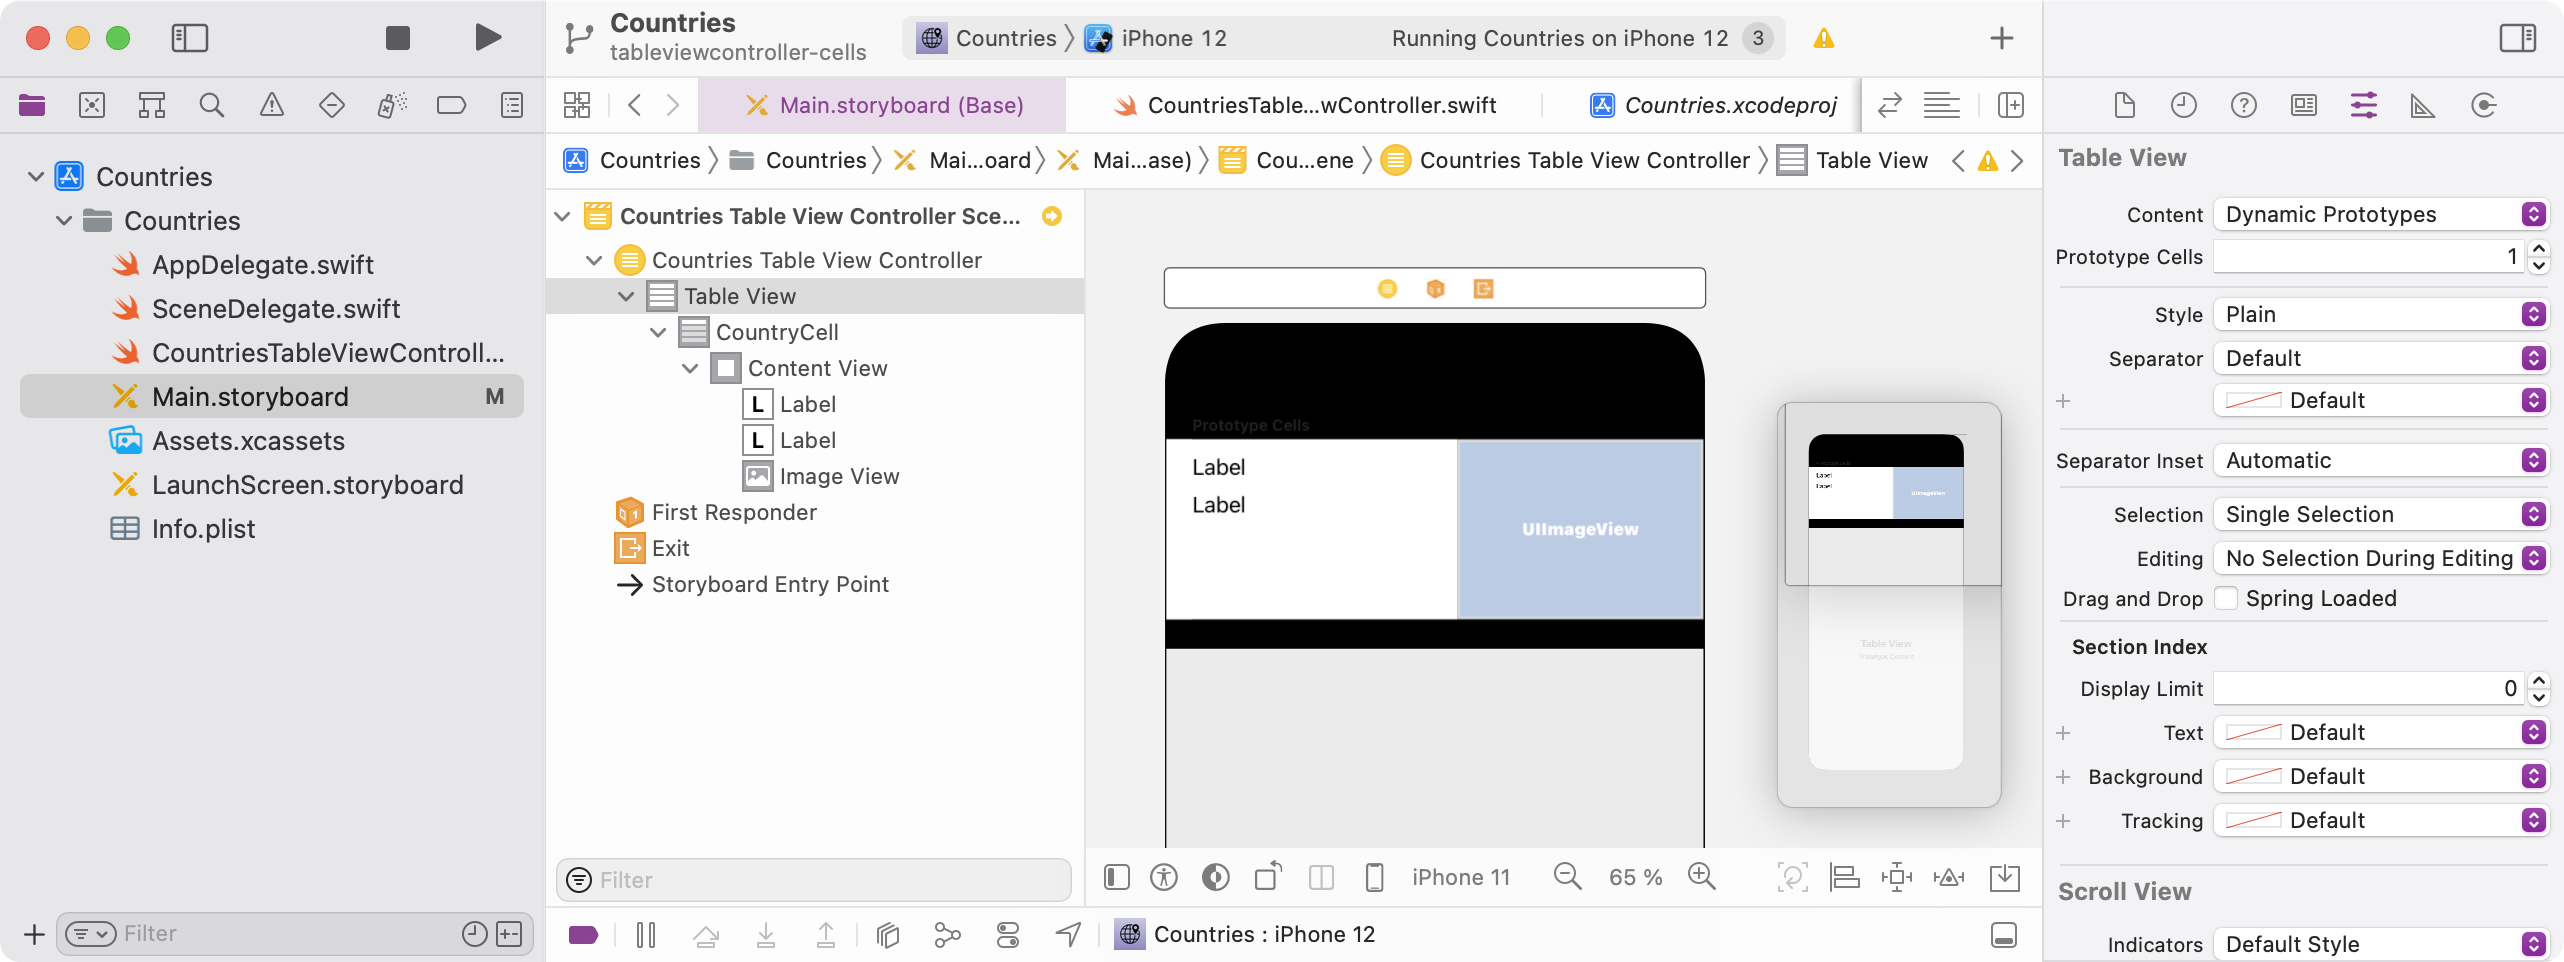
Drag two Labels and an Image View from the Library to the cell and place them like this:
-
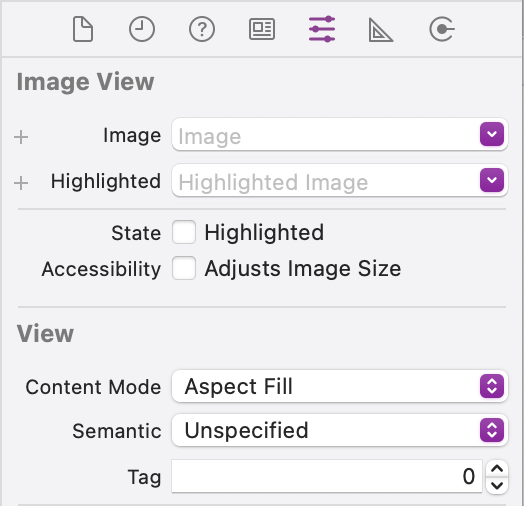
Select the Image View and configure the Content Mode Aspect Fill so that images are resized to fit into the image view:
-
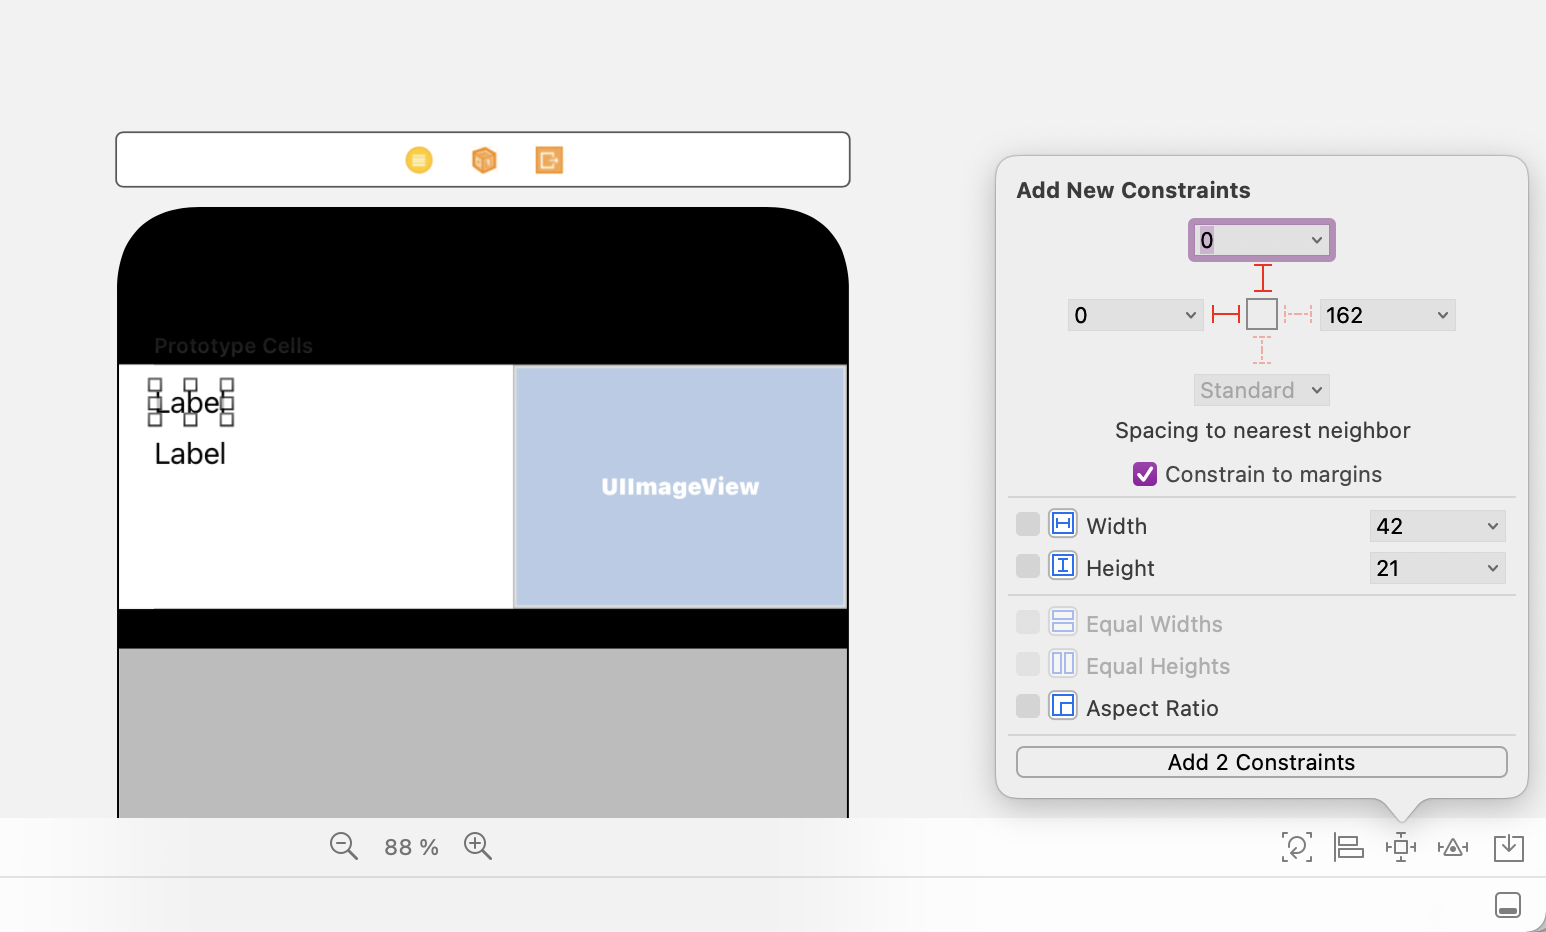
For both the Labels use Add New Constraints to add a Layout Constraint of 0pt to the Left and Top with the option constrained to margins activated:
-
For the Image View, create constraints to the top, right and bottom (Disable constrained to the margins so that there are no margins between the image and the table view cell) and create a width and height constraint:
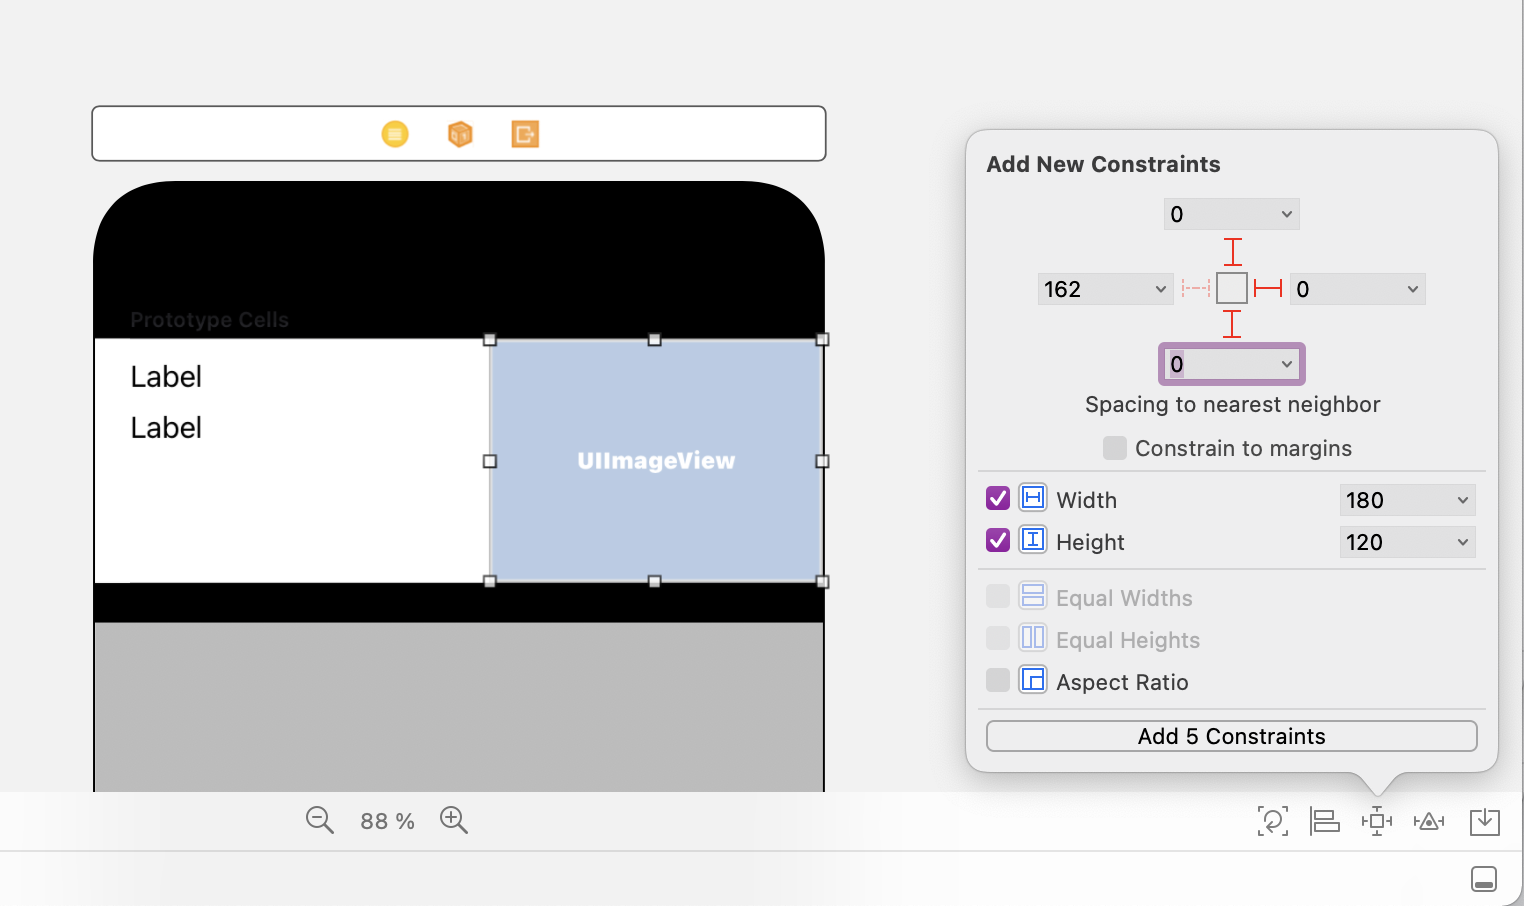
Hint: You can zoom in the storyboard view via Editor » Zoom or with a two-finger touchpad gesture. This is helpful for editing finicky layout constraints.
-
Open CountriesTableViewController.swift in the source code editor, and above the controller class, declare a class CountryTableViewCell for the cell:
import UIKit

struct Country {
    // ...
}

class CountryTableViewCell: UITableViewCell {
}

class CountriesTableViewController: UITableViewController {
    // ...
}
Hint: You could also create a separate Cocoa Touch Class in a separate file. But as cells defined in a storyboard are tightly coupled to the TableViewController, defining both in the same Swift file makes sense.
-
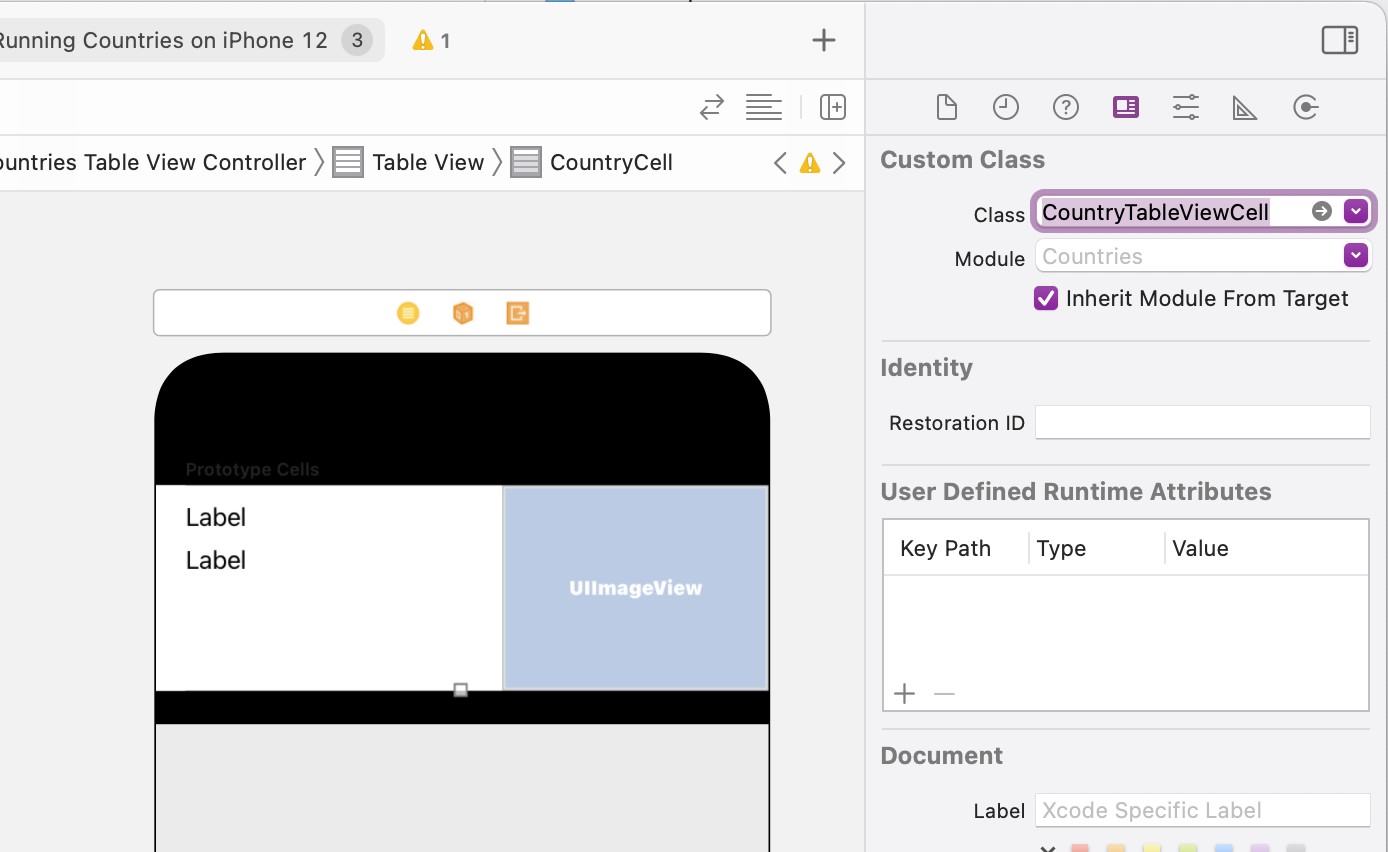
Set CountryTableViewCell as Custom Class for the cell:
-
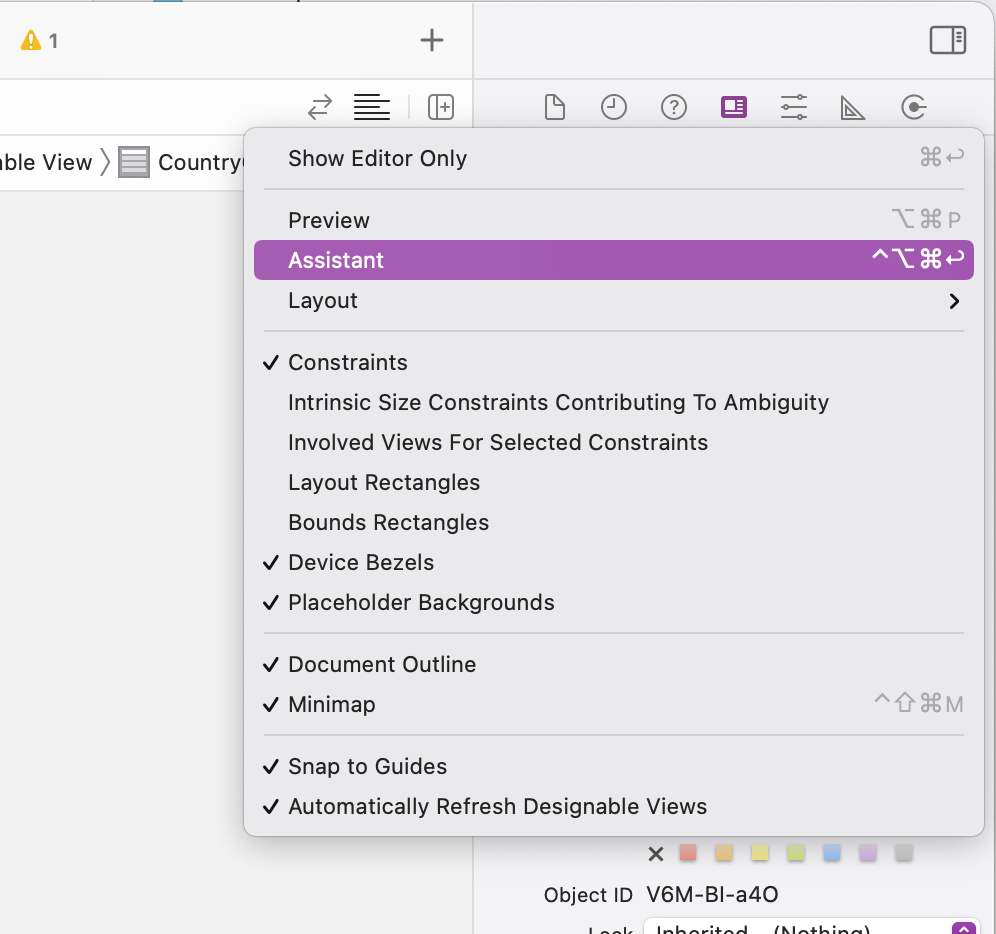
Open the Assistant Editor so that you see the source code besides the selected element in the storyboard:
-
Drag an IBOutlet connection from the storyboard view on the left side to the CountryTableViewCell-class on the right side for the Labels and the ImageView. Name the outlets countryTitleLabel, countryTextLabel and countryImageView:
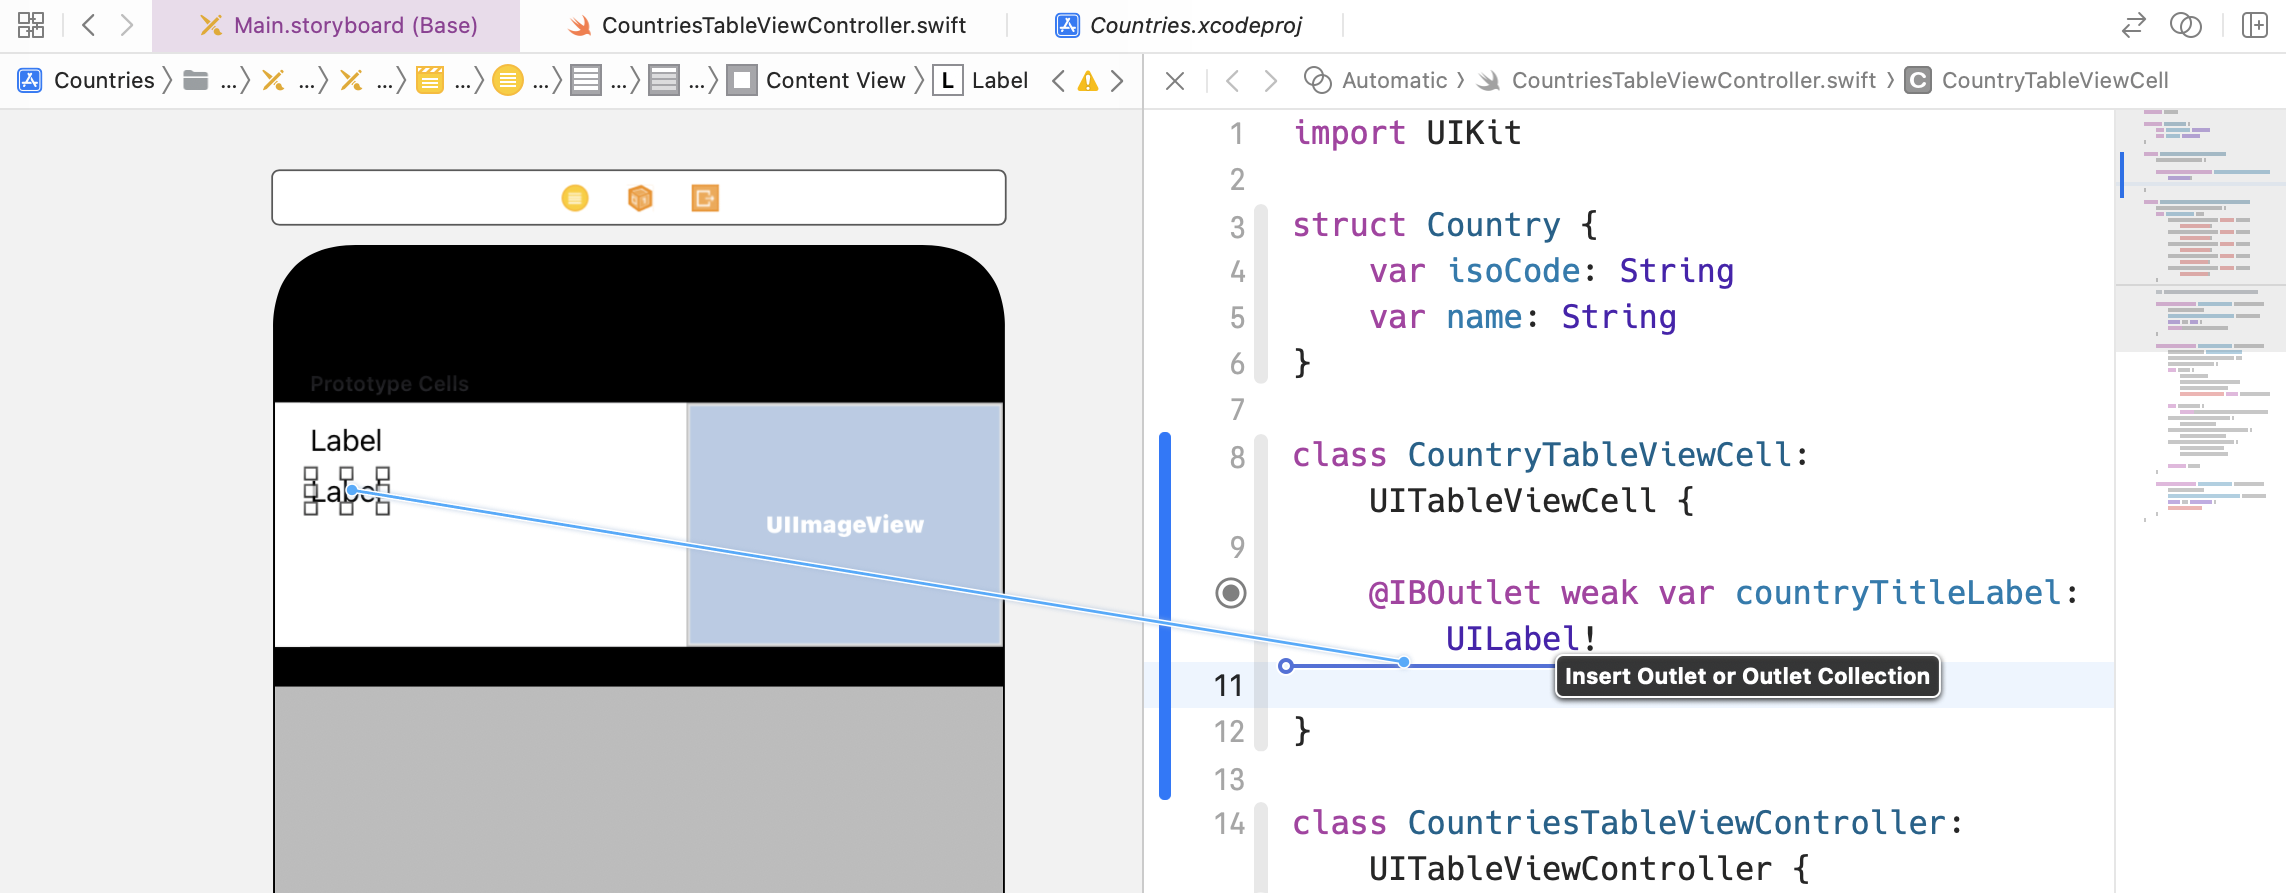
Caution: you cannot name the same as existing UITableViewCell properties like textLabel, image or imageView.
The source of the class should look like this:
class CountryTableViewCell: UITableViewCell {
    @IBOutlet weak var countryTitleLabel: UILabel!
@IBOutlet weak var countryTextLabel: UILabel!
@IBOutlet weak var countryImageView: UIImageView!
}
-
Customize the controller code in tableView(cellForRowAt:) to make use of the new cell class and its properties:
override func tableView(_ tableView: UITableView, cellForRowAt indexPath: IndexPath) -> UITableViewCell {
    let cell = tableView.dequeueReusableCell(withIdentifier: "LabelCell", for: indexPath) as! CountryTableViewCell

    let country = countries[indexPath.row]
    cell.countryTitleLabel?.text = country.name
cell.countryTextLabel?.text = country.isoCode
cell.countryImageView?.image = UIImage(named: country.isoCode)

    return cell
}
-
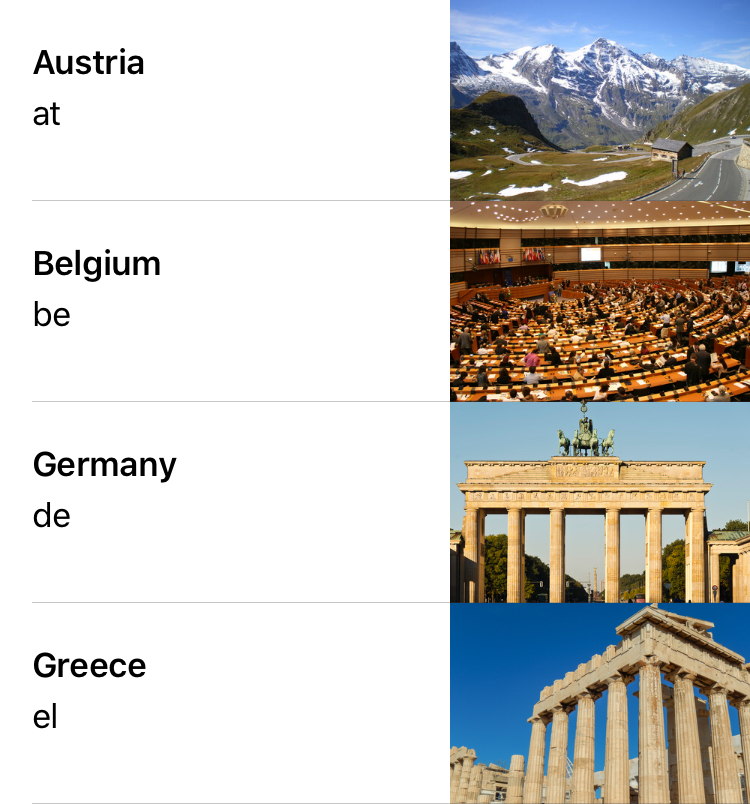
Run the app and check that the result looks like this:
 Blog
Blog Subscribe
 Example project